Tuesday, April 28, 2015

CARROT VERMICELLI PULAO

Hello everyone 
As mother ,of every school going kids, I too have tension of what to give in tiffin daily. My kids are too fussy eater so I have to do extra mental work in planning menu for their tiffin. The thing ,one kid is loving is just hell to other 😰. But this is the dish both are loving ☺️ and I am feeling relaxed. 
 It's good option to replace Maggi as kids generally demand maggi for tiffin but we hesitate to give . My younger one calls it maggi and feels so happy that mamma is not denying at all😁. It's so easy and quick yet yummy recipe for kids lunch box.
Recipe is given below, Hope you will like and try for sure. 

CARROT VERMICELLI PULAO


Ingredients 

1 cup vermicelli 
1 carrot , grated
1 green chilli, slitted 
1 big onion, thinly sliced 
1/2 tsp mustard seeds
1/2 tsp cumin seeds
1 pinch asafetida (heeng)
1/8 tsp turmeric powder 
1 tsp lime juice
1 1/2 tsp oil
1 Handful roasted peanuts (optional)


Method:

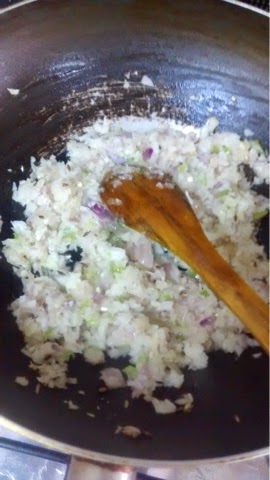
Boil nearly 4-5 cups of water in a deep pot then add 1/2 tsp oil some salt and vermicelli to it and boil for 2-3 mins. Strain it in a sieve and wash with normal water to avoid further cooking and becoming soggy. Heat oil in a nonstick wok, add heeng followed by mustard seeds and cumin seeds. Let it crackle then add chilli and onion. Fry till onion become transparent , then add carrots, turmeric powder and little salt. Saute for 2-3 mins and add strained vermicelli and mix well. Saute for 2 more mins , adjust salt and add lime juice, mix well and done. 


If you like little crunch then add some roasted peanuts on top while serving otherwise it tastes best as it is. I like crunchiness and had only masala peanuts in hand so added it.
Number of chilies can be increased or decreased as per taste, I kept it mildly hot for kids.
You can add any veggies of your choice to make it more healthy, I used only carrots as my younger one like it only.


Your easy peasy breakfast cum tiffin snacks is ready to serve ....just enjoy it with a cup of tea.
Hope you will like and try it. Please let me know your feedback about this recipe by pouring your valuable comments and suggestions.

Happy cooking....


LOW CALORIE PANEER IN CREAMY ONION GRAVY

Hello everyone 
My day starts with thinking how to serve easy yet yummy healthy diet to my family. As my kids are too fond of paneer dishes, I have to cook it every second day for them. But the main problem is they also get bore of same taste everytime. So to make them happy I have to experiment with paneer gravies everytime to avoid monotonous flavour of the dish. At the same time I also try to make it simple and healthy too avoiding unnecessary addition of oil, cream etc. without compromising its taste and texture.
Step wise recipe is given below, hope you all will like it.

LOW CALORIE PANEER IN CREAMY ONION GRAVY


Ingredients 

2 cups cottage cheese ( paneer)
2 cup milk
3-4 big onions, thinly sliced 
1/4 medium size red capsicum ( optional)
1 bread slice
1 tbsp kitchen king masala
1 tsp Kashmiri red chili powder 
1 tsp kasoori methi, crushed 
Salt to taste

Method:

First of all boil onion and capsicum in some water till onions get soft and tender. And let it cool. Then blend it with bread slice using little water in a blender to thick smooth paste.
While making paste only use little water other wise it will splutter a lot while cooking and also take much time.


Now heat 2 tsp oil in a wok and add prepared paste. Fry it for 5 mins then add all masalas and again fry till it starts leaving edges of the wok. Then add milk little by little , stirring continuously. 


Let it boil then add paneer , salt and kasoori methi. Simmer for 5 more mins and done.


Your extremely easy and yummy paneer gravy is ready to serve with roti, naan or rice. There is no fuss no complications only a simple delicious quick healthy dish.


Hope it's upto your expectations and I expect you will definitely pour your love and affection to this dish in form of your valuable comments and suggestions.

Happy cooking....

Monday, April 27, 2015

WHOLE WHEAT FLOUR EGGLESS APPLESAUCE CAKE

Hello everyone
Today again I have a very easy , healthy and yummy cake recipe. I always thought only cakes with egg are extremely soft and have crumbly texture but after trying this one I can say , I was wrong. In this cake , I can bet you are definitely not going to miss that soft crumbly texture of egg cake. As it came out so soft and moist that surprised me beyond expectation and is equally healthy too as having goodness of apples and fibrous flour with less oil.
Recipe is given below and hope will come upto your expectations.

WHOLE WHEAT FLOUR EGGLESS APPLESAUCE CAKE


Ingredients 
2 cup whole wheat flour
1 1/2 cup unsweetened Apple sauce 
3/4 cup sugar
1/3 cup oil
4 tbsp cocoa powder 
1 tsp baking powder 
1/2 tsp baking soda 
1 tsp vanilla essence 
1/2 cup Nutella ( optional)


Method:

Add applesauce, vanilla essence, sugar and oil together and whisk till sugar dissolves.
Add all dry ingredients together and mix well.
Now add dry ingredients in wet one in two batches and fold gently to get lump less smooth batter.
If batter seems dry some water can be added to get idli batter like consistency of batter. Avoid over mixing. Now in a greased bundt cake pan pour half the batter and then spread a thin line of Nutella on it in middle. Finally cover it with remaining half batter. Immediately bake it in microwave at high for 5 mins. Check it for doneness with toothpick or skewer by inserting in middle of cake, if it comes clean then done otherwise bake for another 30 secs. Let it cool for 10 mins in pan then invert on a wire rack. Slice and serve when completely cool.
It can be made in conventional oven too at 180degree Celsius for 25 to 30 mins. Again check for doneness as different ovens may have different baking time.

For home made unsweetened apple sauce ( for 1 1/2 cup):

 2 apples peeled and thinly sliced
1/4 cup water

Boil apples in water till they become soft. Then let it cool and blend in a smooth paste.
Your easy healthy applesauce is also ready to use.


This is very easy recipe with handy ingredients that any one can bake. Hope you all will like it so please stop by and pour your valuable comments and suggestions.

Happy cooking....


Friday, April 24, 2015

LOW CALORIE ALMOND CHICKEN

Hello everyone
My today's recipe is dedicated to non vegetarians who are equally health conscious too. Generally chicken, mutton, fish etc calls for extra oil than regular cooking that's why people hesitate to try curry dishes and end up with grill or baked ones. So I tried to come up with some healthy and lip smacking chicken curry recipe to be indulged without guilt.
Step wise recipe is given below and hope you all will like it.

LOW CALORIE CHICKEN CURRY 


Ingredients 

900 gms boneless skinless chicken breast , cubed
1/4 cup beaten thick curd
1/2 cup soaked almonds
1/2 cup green coriander leaves
2-3 green chillies
4 medium tomatoes, de seeded and purried 
1 big onion thinly sliced
2 tbsp onion powder or paste of fried onions
2 tsp ginger garlic paste
1/2 tsp turmeric powder 
1 1/4 tsp garam masala powder 
2 1/2 tsp chicken masala 
2 tsp Kashmiri red chili powder 
2 tbsp oil
1 tsp ghee


For tempering 

2-3 bay leaves
1/2 tsp cumin seeds
7-8 cloves
4 green cardamom 
1 mace piece
2 inches cinnamon stick

Method:

First of all make thick paste of almonds , green chilies and coriander leaves using little water. You can also peel almonds, I skipped it as it's not affecting texture and flavour of dish anyhow.


Now heat oil and ghee in a big vessel and add all tempering spices. Fry till aromatic but don't burn, then add sliced onions and fry till nice brown. Now add ginger garlic paste and sauté for few minutes. 


Then add purried tomatoes and fry on high flame till it get cooked and dry. Then add all dry spice powders and fry for 2 mins on medium flame , take care while frying so that spices don't get burn. Now add almonds paste and fry till it starts leaving the edges of vessel. Then add onion powder or paste and saute for 2 mins. 


Then add chicken and some salt , fry on high flame to retain moisture in chicken stir repeatedly to avoid sticking to bottom and burning. Add beaten curd and fry till chicken get fried from all sides and looks evenly white. Now 2 cups of water and mix well. Adjust seasoning and let it cook, covered till chicken become tender.


Now your tempting, lip smacking chicken curry is ready to serve with roti, naan or rice.


You can increase or decrease water in curry according to your preference of consistency.
This is very simple yet delicious dish , a must try for chicken lovers. I bet you will not get disappointed at all.
Enjoy it and please shower your precious comments and suggestions to this dish. I'll always appreciate your efforts to encourage my lil steps toward healthy cooking.

Happy cooking....


Wednesday, April 22, 2015

STUFFED BRINJAL ( BHARWAN BAINGAN) Konkani Recipe

Hello everyone
After posting tempting sweet dish, today I came with a tangy spicy stuffed brinjal recipe to boost your taste buds.
Generally brinjal is not liked by majority of people including my hubby and kids, though I love brinjals in any form. But this dish has unique flavours to attract even brinjal haters also. This is a Konkani dish which I manipulated in my way, hope you all will like it.
Step wise recipe is given below.

STUFFED BRINJAL ( BHARWAN BAINGAN) Konkani Recipe


Ingredients 

8-10 small brinjals
3/4 cup grated raw coconut 
2 green chilies 
1 tsp ginger garlic paste
1 small lime size tamarind ( soaked)
1/4 tsp chilli powder 
1 spring curry leaves 
1/2 tsp mustard seeds
1/4 tsp asafetida ( heeng) powder
1/2 tsp turmeric powder
1/4 cup water
1 tbsp oil
Salt to taste

Spices to dry roast

1 tsp whole coriander seeds
1/4 tsp fenugreek ( methi) seeds
1/4 tsp fennel (saunf) seeds
1/4 tsp nigella ( kalouji) seeds
1/4 tsp carom ( ajwain) seeds

Method:

Dry roast all spices mentioned under dry roast column, till aromatic.
Now grind them with coconut, green chilies, ginger garlic paste, tamarind, 1/4 tsp turmeric powder and salt , to make a coarse paste.


Now slit brinjals in four parts so that they are joined at end.


 Stuff all the brinjals with prepared spice paste.


Heat oil in a wok and add heeng followed by mustard seeds and curry leaves. When mustard seeds get spluttered, arrange brinjals in wok in a single layer so that they get cooked evenly. Now add water and sprinkle chili powder and rest of turmeric powder to it.


Cover it and let it cook till all water evaporates and it become nicely golden in color and leave oil. Flip brinjals in between to get it evenly cooked and nicely golden.


Your yummy, tangy and spicy stuffed brinjal is ready to go with rice dal combo or parathas. 


To get more inviting color to your dish you can replace green chilli with red chili in stuffing too, which I avoided.


Hope you all will like this easy yet tempting side dish and pour your valuable comments and suggestions here.

Happy cooking....

Tuesday, April 21, 2015

NO CREAM MANGO ICE-CREAM

Hello everyone
Today I have summer cooler easy peasy ice cream recipe. As summer started and everyone need some chilling cooler to beat the heat.
With hot summer the first pleasing name comes to mind is the king of fruits MANGO. I think no one can say 'no' to this yummy droolsome fruit, everyone from kids to elders love it, Even my mom is a big fan of mangoes. So thought to try my hands on mango ice cream without using creams and artificial colors or flavours but with easily available handy ingredients with no compromise in taste. And the end result is so tempting and yummilicious that you can't resist yourself asking for another scoop. Even my fussy eater kids loved it.
Step wise recipe is given and hope you all will like this summer cooler.

NO CREAM MANGO ICE CREAM


Ingredients 

1 lt milk
1/2 tin condensed milk
1 1/2 cup mango pulp
4 tbsp sugar
3 tbsp corn flour 
1/3 cup water

Method:

Heat milk in a thick bottom pan till it become nearly half. Stir occasionally to avoid burning at bottom.


Now add sugar, condensed milk and corn flour (dissolved in 1/3 cup of water) to it. Stir continuously as it thickens very fast and stick to bottom. When it acquire the consistency of dosa batter thickness, turn off the flame and let it cool.


When it become warm then add mango pulp to it and mix well.


Now pour it in an air tight container and keep it in freezer at high for 4-5 hrs.
To get more smoother ice cream , take it out from freezer after 1 hr and churn in a mixer for few pulses. Again pour in same container and freeze for 4 hrs. It will yield nearly 1 lt of ice cream.


Your easy peasy summer cooler mango ice cream is ready to serve. Enjoy it and please pour your valuable comments and suggestions . I will always like to reply your queries regarding recipe. So please keep asking if any confusion.

Happy cooking....

Friday, April 17, 2015

CHILLI CHANA METHI PANEER

Hello everyone 
I am here with another healthy addition to your diet. Its name tells everything about it. My kids are great fan of paneer so generally my dishes are full of paneer but to have paneer every second day with same taste sounds little weird. To spare us from this boredom of taste I usually give my twist and turns to these dishes to make them more interesting and presentable. So that kids tummy bhi khush aur mummy bhi khush.  

This is so simple yet delicious side dish full of protein and iron. To give it further more healthy touch I avoided using cream and more oil. Even then it is so yummy to be a part of any party menu also.
Step wise recipe of dish is given below ,hope you all will like it.

CHILLI CHANA METHI PANEER


Ingredients 

1 1/2 cup cottage cheese ( paneer)
1 cup finely chopped fenugreek leaves ( methi leaves)
1 1/2 cup boiled chickpeas 
1 cup cubed colored capsicum 
1 1/2 cup milk
2 big onions ( finely chopped in chopper or pureed)
2 tsp ginger garlic paste
3-4 green chilies finely chopped 
1/2 tsp cumin seeds
1/4 tsp asafetida ( heeng)
3/4 tsp cumin powder
1/2 tsp garam masala
1 tsp kitchen king masala
2 tsp curry powder 
1 tsp kasoori methi 
Salt to taste


Method:

First of all drizzle some oil on a non stick pan and stir fry capsicum till they get little charred. It will give little smokey flavor to curry.


Now heat 1 tbsp oil in a wok and add heeng followed by cumin seeds. Let it splutter then add chopped or pureed onion and chilies. 


 Fry till they become light golden and then add ginger garlic paste and saute for 2 more mins.


Then add all masalas and little water to avoid burning of spices. Let it fry till nice aroma comes and It starts leaving edges of wok.


Then add chopped methi leaves and fry for further 4-5 mins till methi leaves get cooked.


Add boiled chickpeas and fry for 2-3 mins.


Now add milk and let it boil.


Finally add paneer, capsicums, salt and kasoori methi. Let it simmer for 5 more mins.


And it's done. You can adjust seasoning and gravy consistency as per your taste at this stage.


Now it's ready to serve. This is so easy and healthy recipe to relish on.


This can be served with roti, naan, rice etc and can be a part of your party menu too.
Hope you will like it and will definitely give it a try. So please give your valuable comments and 
suggestions also. I will be glad to reply your appreciations and suggestions.

Happy cooking.....

Wednesday, April 15, 2015

MANGO AND STRAWBERRY VEG JELLY

Hello everyone 
Today I am here with kids favorite jelly recipe. 
My kids are too fond of jellies and can have any time. They always insist to buy , so I thought why not to give it a try at home also. I always try to avoid non veg addition to my daily cooking so tried my hands on agar agar for this recipe. As summer is knocking and lovely aromatic mangoes are in season and also had some strawberry syrup in hand so made these irresistible mango and strawberry veg jellies.
This is so easy and quick recipe that you all will definitely going to love it and surely will try also.


Ingredients

Lt water
gm agar agar strings ( China grass )
3-4 tbsp sugar (as per taste)
tbsp strawberry syrup
1/4 cup mango pulp


Method:

Soak agar agar in 1 cup water for 20- 30 mins.


 Heat 1 Lt water in pan and add squeezed agar agar in itCook till agar agar get completely 
dissolved in itNow add sugar in it , cook till sugar dissolve and turn off the flame.


Let
 it cool a little ( nearly 5 minsthen divide it in two equal partsNow add strawberry syrup to one and mango pulp to other part and mix well


Pour in desired molds and let it set for 15 - 20 mins.


It
 gets set at room temp itself but to fasten the process you can keep it in fridge also.
It tastes better when served chill.
If you are willing to make double layer jelly then pour one flavor in mold and let it set a little then 
pour second flavor .


Be careful with your jelly mixture as it will  set at room temp also , so to keep it in liquid form make sure to keep it warm.
When one layer is setting , keep the left one mixture in hot water bowl 
to avoid setting it in jelly form .
You can make jelly of any fruit juice of your choicein the same way.
You can add more sugar as per your taste . I kept it mildly sweet.
Your so easy yet delicious veg jelly is ready to serve to your lil munchkinsI am sure 
they will love it. It can be served as party snack for kids, in tiffin or in evening snack 
They will always love to relish on this lovely colorful dessert.


I hope you will like this easy peasy kids friendly recipe . Please share your valuable comments and suggestions to improve my effort further and give you more satisfying easy yet healthy recipes always.

Happy cooking....